Measurement & marking out
Micrometer
Before using a micrometer:
- hold the micrometer by the frame with your left hand
- keep the graduations facing towards you
- loosen the spindle lock, and with your right hand undo the thimble and clean the
anvils with a clean cloth.
Checking the accuracy of the micrometer
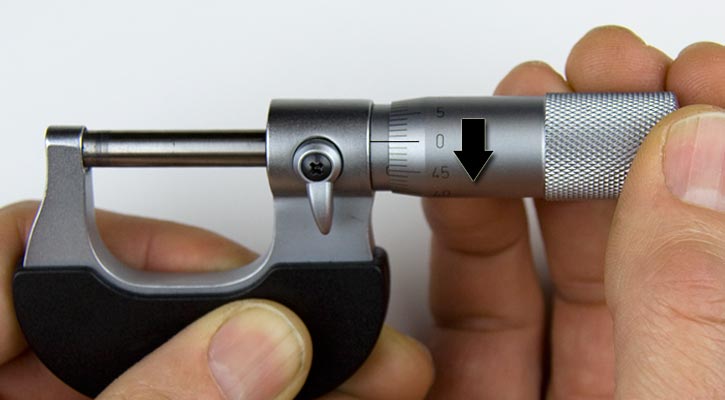
Checking micrometer accuracy
- screw the thimble (by the ratchet if fitted) inwards until the anvils are touching (This must be done gently)
- look at the scales, they should both read zero.
Reading the micrometer scale
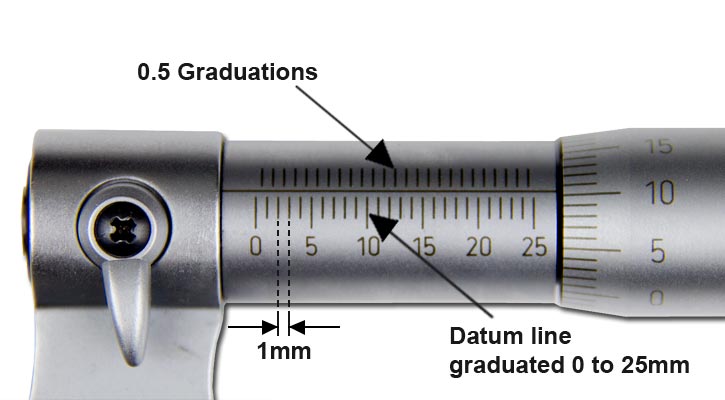
Micrometer scale
Readings come from the scale on the sleeve of the micrometer as well as the turning thimble. The graduations on the sleeve are 0.5mm on one side of the datum line and 1mm on the other side of the line as shown above.
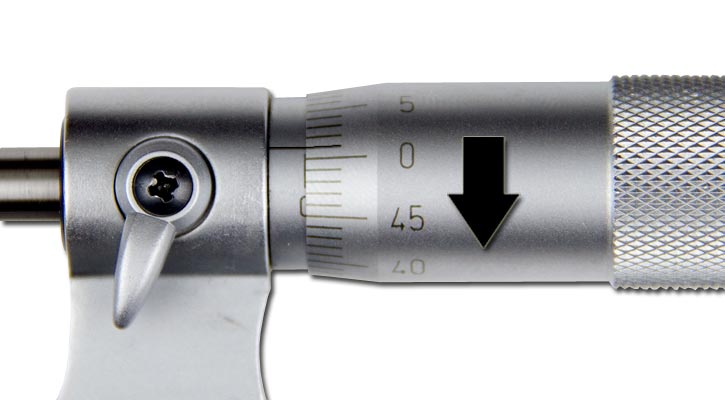
Micrometer reading of 0.01mm
- open the anvils by turning the thimble to one division past zero. One division equals a reading of 0.01mm.
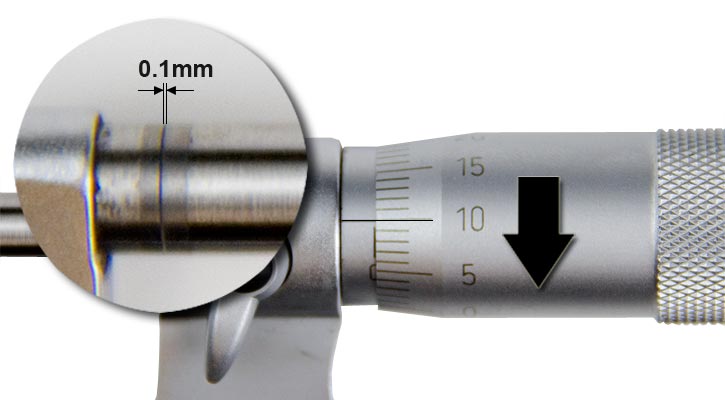
Micrometer reading of 0.1mm
- continue turning the thimble until the tenth line of the thimble is level with the datum line.
- hold the micrometer up to the light. The small gap between the anvils is 0.1mm.
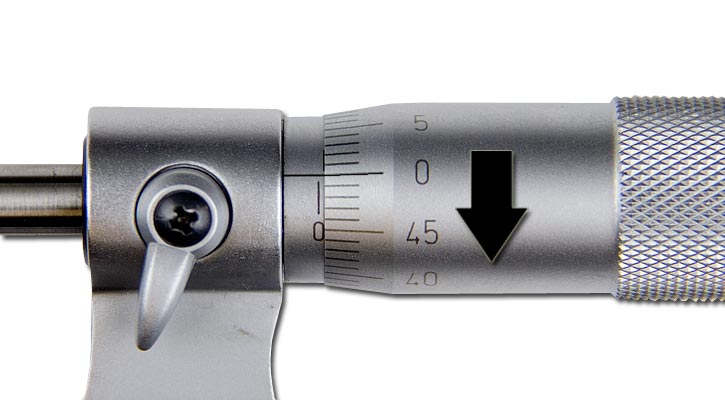
Micrometer reading of 0.5mm
- continue turning until the 50th line of the thimble is level with the datum line (one complete turn):
- the anvil gap will now be .5 of a millimetre (0.5mm)
- the first graduation on the sleeve is now visible.
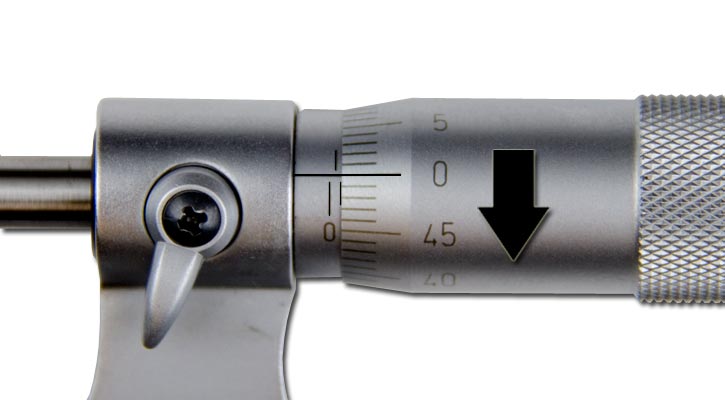
Micrometer reading of 1mm
- continue turning the thimble one more complete turn:
- the anvils are now open 1 millimetre (1 mm)
- the first numbered graduation on the sleeve is now visible.
Example measurement
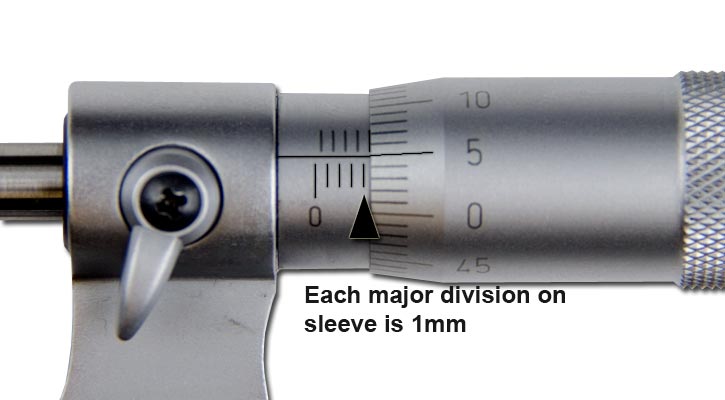
Major division reading of 4mm
- The number of whole millimetres that are completely visible on the sleeve is four. (4 mm).
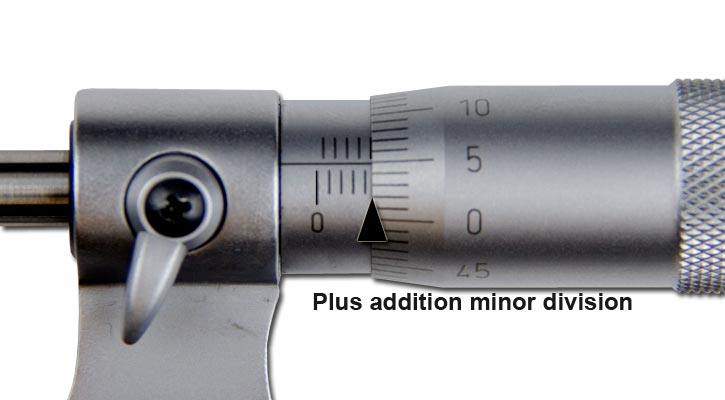
Minor division reading of 0.5mm
- Count any half millimetres that are completely visible on the sleeve and add to the 4 mm.
Therefore, 4 mm + .5 mm = 4.5mm.
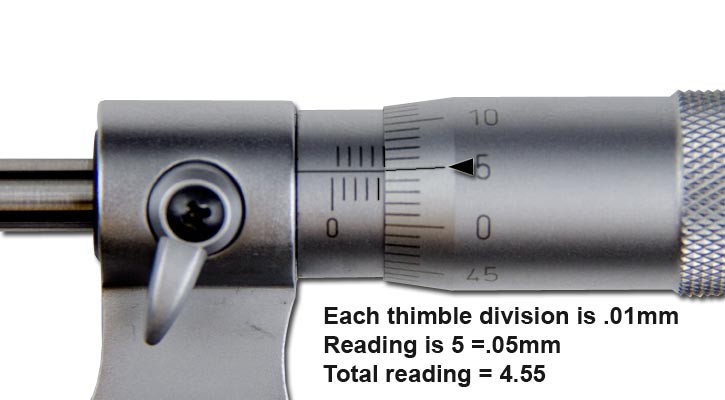
Thimble division reading of 0.05mm
- The 5th line on the thimble is lined up with the datum line. This equals .05mm. Added to 4.5 equals 4.55mm.


