Once you have selected the correct browser for your circumstance, Collaborate Ultra is located within each Canvas course shell. If you are reading this, you are likely already in your course. Excellent! Next navigate to the module section, find the relevant topic or weekly content link and the link the teacher has provided . Alternatively, you can short-cut to the Collaborate Ultra tab, also on the left hand course menu.
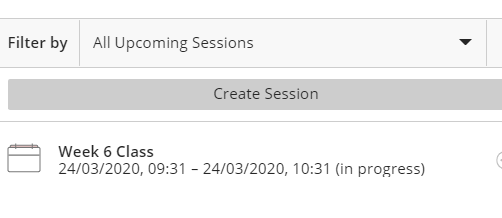
Here you will see a list displaying your upcoming, or currently running, class. Select it and choose “Join Session”. Your class will then open in a new tab.
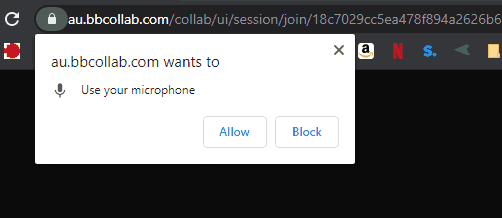
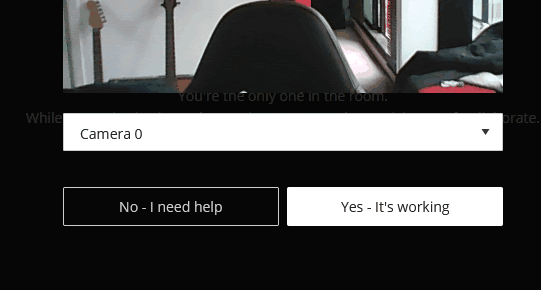
When you first load Collaborate Ultra a dialog box will appear about allowing your browser to access your mic. Make sure you select “Allow”.
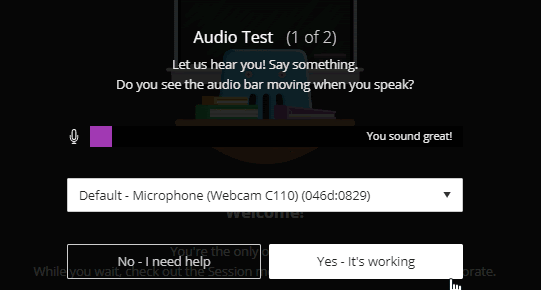
Within your browser window a dropdown menu will appear where you can select what your mic input is. Make sure to select the correct one depending on your circumstance.
YOU MUST USE HEADPHONES to prevent the feedback of audio that could potentially damage your hearing, and that of fellow class members and your teacher.
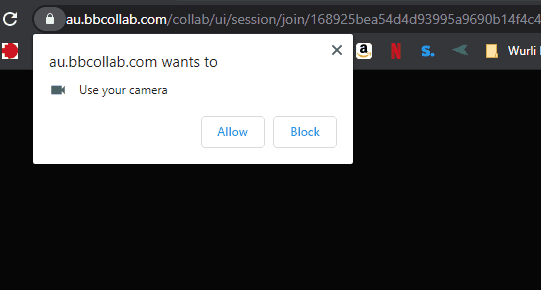
After selecting your audio input a dialog box will ask if you wish to allow video access. Make sure to also click “Allow”. Levels will appear in pink on the meter after you have allowed access.
Within your browser window a dropdown menu will appear where you can select what your camera input is. Make sure to select the correct one depending on your circumstance. A preview of your camera will appear on correct selection.
Now that you have correctly set up your equipment you are now inside your online class.
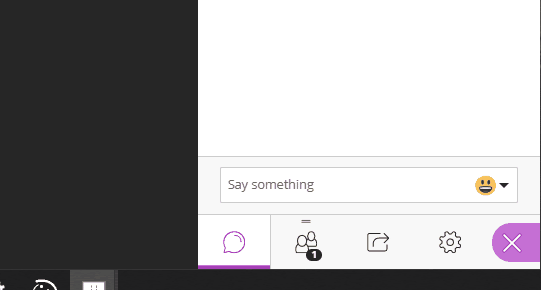
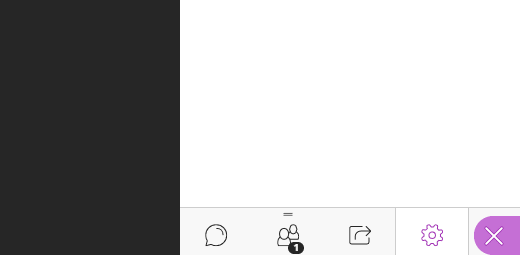
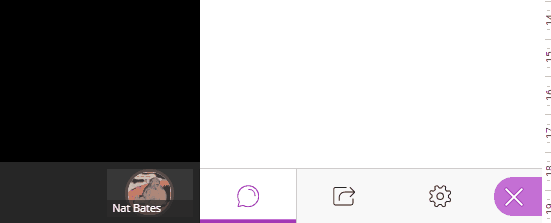
You have two methods of communication in Collaborate Ultra, the first being the chat window. Chat is found within the pink arrow, located on the bottom right of your screen.
Here you can type to the class at the bottom of the chat window as well as view others’ written messages.
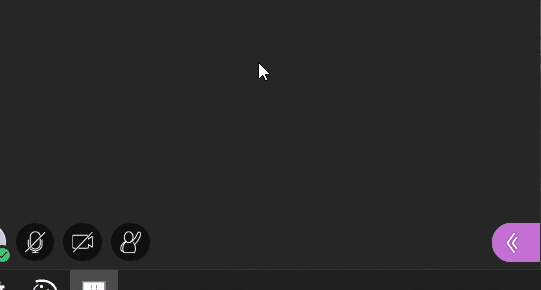
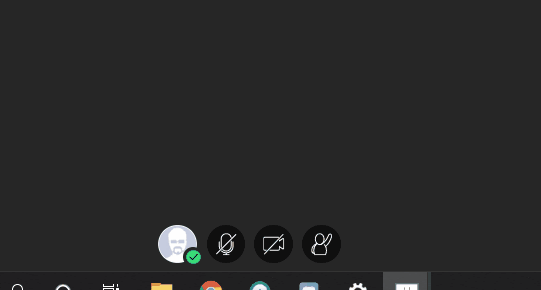
The other option for communication is using the mic you previously set up. To turn your mic on and off, select the mic icon found at the bottom centre of your screen.
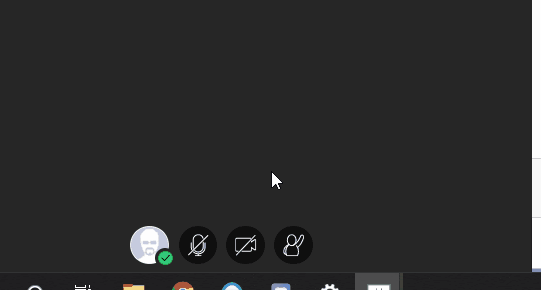
Note: As a good practice, keep voice communication minimal and remember to turn off your mic when not in use.
Some teachers might allow video communication. To do so click the camera icon found bottom centre screen next to the mic on/off icon.
A dialog box will appear showing a preview of your camera, select “Share video” to confirm the sharing of your camera.
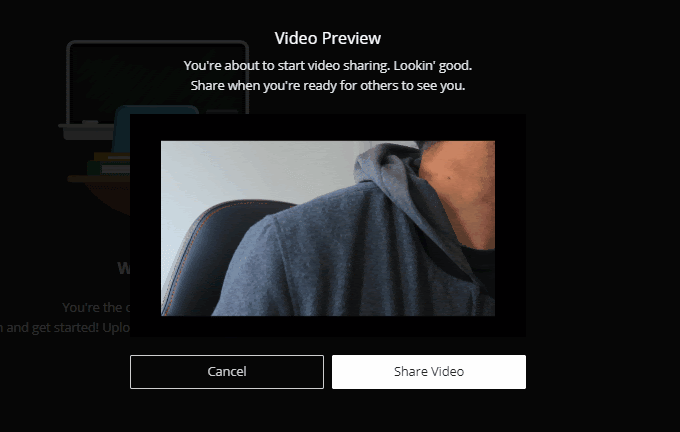
Note: Sending video over the internet consumes a lot of bandwidth for not only you but all members within your class. As a result, it is best to limit video sharing. For example; briefly at the start or end of session, or when/if you are required to present to the group.
There are times when your teacher might require you to share your screen to the class or to them privately. To do so click the share content icon found within the same pink arrow menu as chat.
Then a collection of options will appear at the top of the pink arrow menu, one being “Share Application/Screen”.
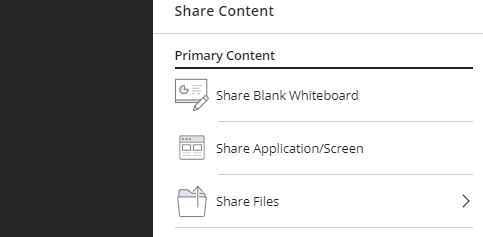
A dialog box will appear asking what you would like to screen share on your computer.

Below is a list of what each choice means:
- Your Entire Screen – This is where you can select which monitor you wish to share if you have multiple. Note this will also show your desktop.
- Application Window – This allows for you to share an application window only.
- Chrome Tab – This allows for you to choose a specific tab with your browser.
Issues may occur when setting up communications. First thing to consider is, are you unmuted.
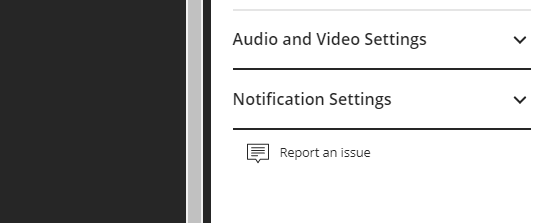
It is an obvious one but a problem that does occur frequently. If this is not the case there is a chance you chose the wrong input on setup. To make adjustments to your setup click the cog icon found on the bottom right of your screen.
Above this, two options will appear: “Audio and Video Settings” and “Notification Settings”.
Click “Audio and Video Settings” and choose “Setup up your camera and microphone”.
This will initialise the mic and video setup again. Make sure to select the right inputs.
To view recordings of previous classes, go to the Canvas course shell, and select Collaborate Ultra.
Then from the hamburger menu, the three lines located to left of the heading “Sessions”, select Recordings.

A list of previously recorded sessions will appear, select the one you wish to view and hit “Watch Now” and the video will start playing including any chat window discussions that may have occurred throughout that class (Just select the left arrow bottom right of the video).